Filtering Google Maps with Statamic and Alpine.js
After writing about Google Maps with Statamic and Alpine.js, I thought it might be nice to extend this piece by adding some basic filtering on the map, and provide a nice interaction that would look like this:
In order to achieve this, we’ll need to create a taxonomy in Statamic so that each location can reference a shared location_type taxonomy, which we can use to filter the list of locations displayed, as well as their corresponding pins. In addition, we’ll leverage the Alpine Components Listbox.
If you don’t want to use the (paid) Alpine components, a simple select element with an x-model should do the trick, though you won’t get the keyboard interactions or the nice styles.
Creating a taxonomy in Statamic
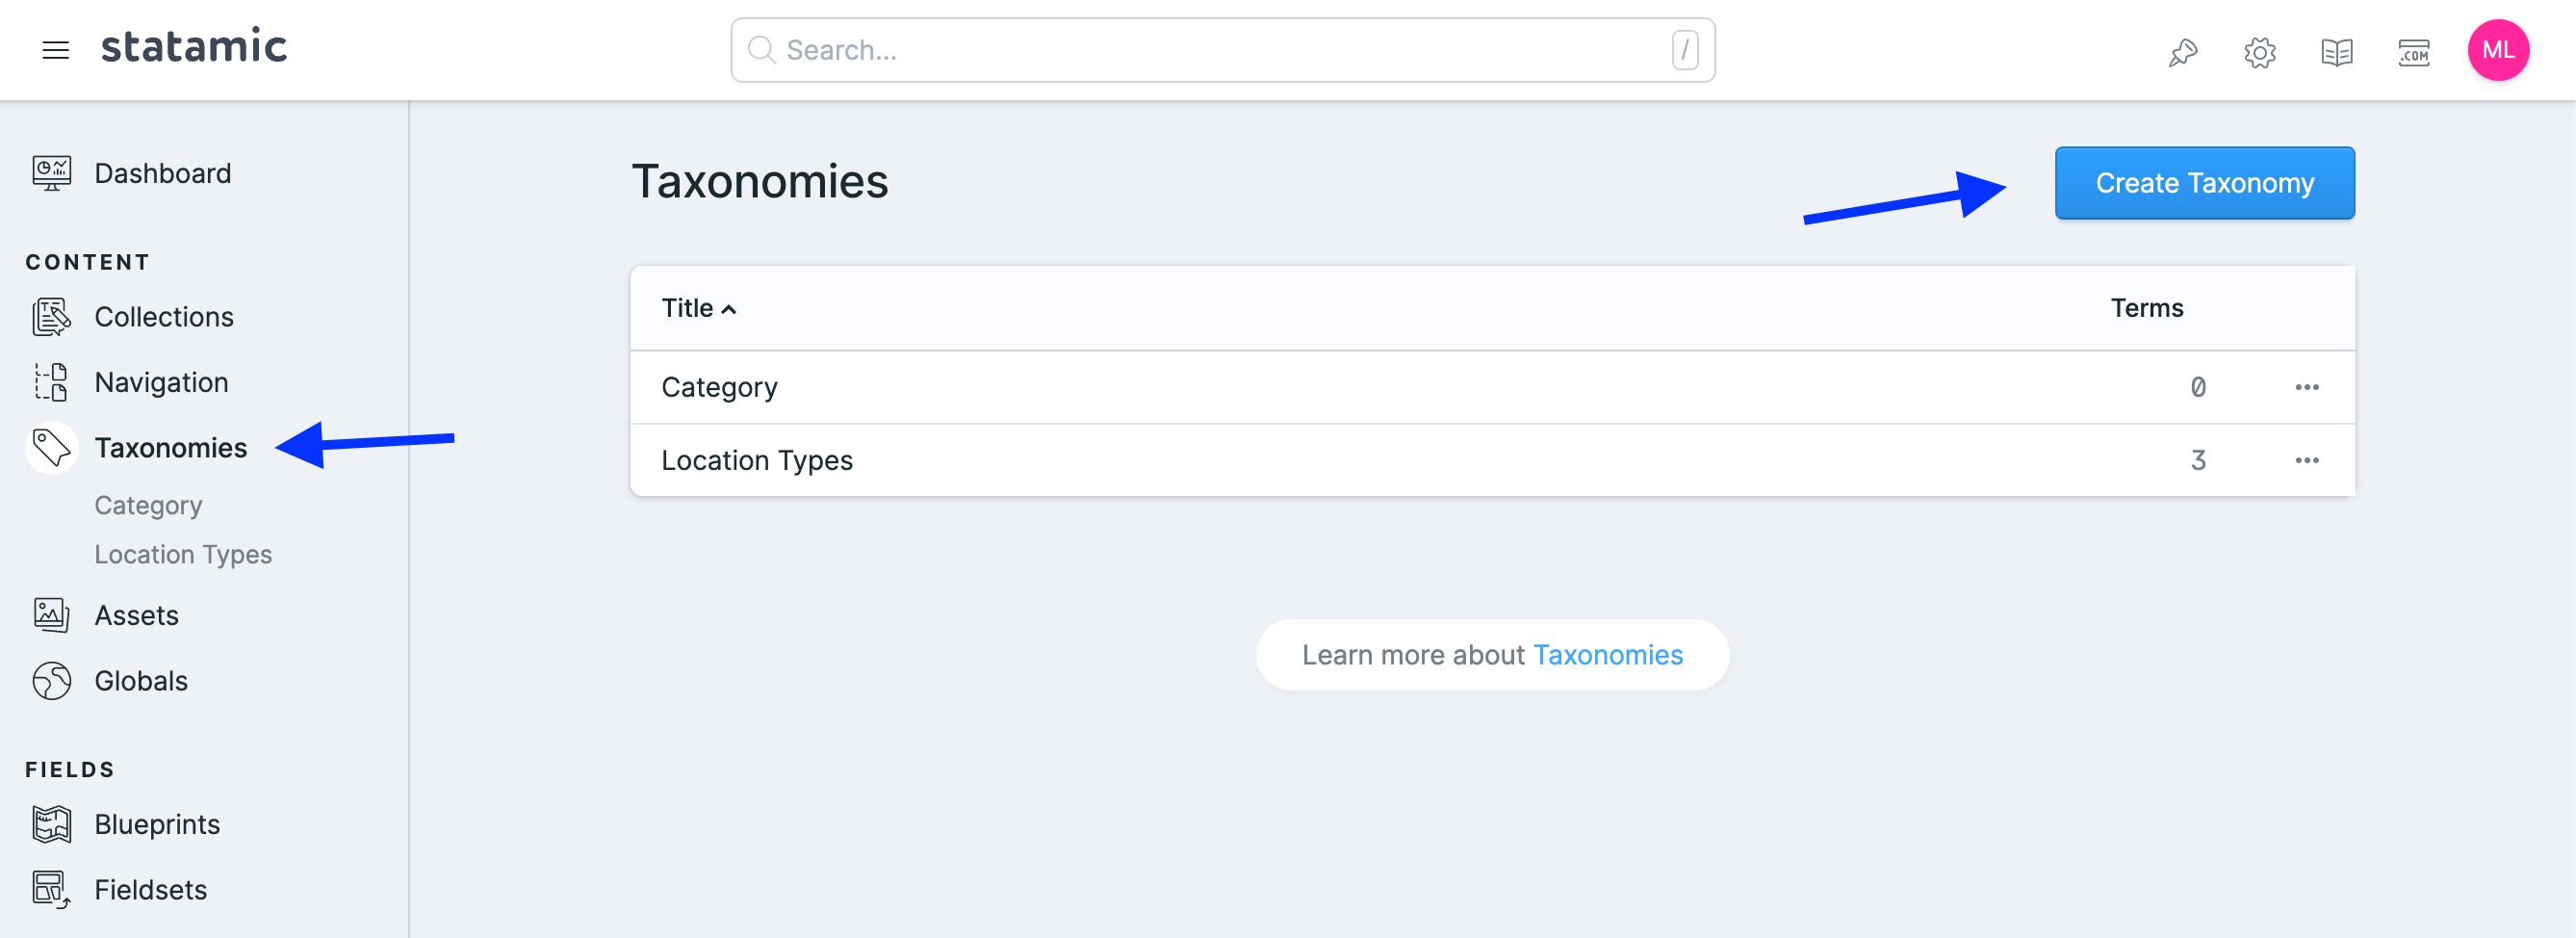
To begin, I created a taxonomy in Statamic called Location Type, and seeded a few terms like restaurants, schools, and industrial to start out with.
This is easy enough to accomplish in the Statamic dashboard - in the Taxonomy section of the dashboard, click the big blue button to create a new taxonomy, and fill in the requied fields. That’s it!
Once we create some terms for the taxonomy, we can add a field into our Locations fieldset, which will reference this new taxonomy’s entries.
Updating the the view templates
In the template that shows our buttons on the left side of the view, we can add a new section above it to show our taxonomy terms. For the listbox, we’ll add this container that handles the component logic; otherwise, we’d use a select element with the same x-model binding to control the active term. Most CSS classes are omitted for brevity:
<div
    x-listbox
    x-model="locationFilter"
    class="relative mb-4"
    x-effect="filterMarkers"
>
    <label x-listbox:label class="sr-only">Location Type</label>

    <button x-listbox:button>
        <span x-text="locationFilter ? locationFilter : 'Filter locations'" class="truncate"></span>
        <!-- Heroicons up/down can go here-->
    </button>

    <ul
        x-listbox:options
        x-transition.origin.top.left
        x-cloak
        class="absolute left-0"
    >

        <!-- list items go here -->

    </ul>
</div>
As for the list items, we will output them as buttons (as below), or as select options with the same value:
{{ taxonomy:location_types }}
<li x-listbox:option value="{{ title }}">
{{ title }}
<span x-show="$listboxOption.isSelected">✓</span>
</li>
{{ /taxonomy:location_types }}
Finally, we will update the location list items to show only when each one’s respective term is active:
<ul class="space-y-4">
    {{ locations }}
        <li x-show="locationFilter == 'All' || locationFilter == '{{ location_type['title'] }}'">
            <button
                type="button"
                data-lat="{{ latitude }}"
                data-lng="{{ longitude }}"
                data-name="{{ name }}"
                @click="focusLocation"
                >
                {{ name }}
            </button>
            <p>{{ short_description }}</p>
        </li>
    {{ /locations }}
</ul>
Hooking up the Alpine component
Next, we need to leverage the Listbox behaviour to filter our markers and buttons. Notice the listbox has the x-effect="filterMarkers" attribute - this is so that the filterMarkers method will fire whenever the locationFilter model changes.
This will also fire when the component loads, so we can set up our initial marker display logic here in this method.
But first, we need to add a property to our markers so that they are aware of the new data (see the post linked at the top for more complete code):
// part of the async setMarkers method

const { AdvancedMarkerElement } = await google.maps.importLibrary("marker");

listings.forEach( location => {
    const marker = new AdvancedMarkerElement({
        map: map,
        title: location.name,
        position: {
            lat: parseFloat(location.latitude),
            lng: parseFloat(location.longitude),
        },
    })

    // this is our location term from Statamic 👇🏼
    marker.locationType: location.location_type.title
});

// etc.

this.markers.push(marker)
Finally, we need to flesh out a few more methods so that that the filtering mechanism can a) set or remove the markers from the map, and b) resize the map bounds according to the new list of markers showing:
// Function to be called on `x-effect`
filterMarkers() {
    const map = Alpine.raw(this.map);
    const filteredListings = [];

    this.markers.forEach(item => {
        if(this.locationFilter == 'All' || item.locationType == this.locationFilter) {
            item.map = map;
            const listing = this.listings.find(listing => listing.name === item.title);
            filteredListings.push(listing);
        } else {
            item.map = null
        }
    })

    // errors will be thrown if there are no markers,
    // which will happen the first time this runs
    if(!this.markers.length) return;

    // set new map bounds after
    // filtering the markers
    const bounds = this.getBuildingBounds(filteredListings);
    this.setMapSize(bounds, map)

},

setMapSize(bounds, map){
    if(bounds) {
        // changes the map bounds based on the filtered data
        map.fitBounds( bounds );

        // handy for adjusting with the window resizes,
        // not detailed here
        this.handleBoundsOnResize({ bounds, map })
    }
},

getBuildingBounds(listings) {
    const lats = listings.map(listing => parseFloat(listing.latitude))
    const lngs = listings.map(listing => parseFloat(listing.longitude))

    const buildingBounds = {
        north: Math.max(...lats),
        south: Math.min(...lats),
        east: Math.max(...lngs),
        west: Math.min(...lngs)
    }

    return buildingBounds;
},
Wrapping it up
The magic of Alpine’s x-effect lets us tap into the changing value of the location filter term, and run our methods without the need to write any more code to run them explicitly. And without much more effort, we can resize the map to fit with the currently displayed markers. Even better, it runs straight away, without needing us to invoke the functions directly.
On top of that, the Alpine Listbox gives us a nice little accessible UI that we can style the way we want. Have you got your hands on Alpine Components yet?
I’d suggest you do.

Join my Email List
Get notified about my work with Statamic - from new YouTube videos to articles and tutorials on my blog, and more.