Depoying to Statamic with Laravel Forge
One of the great benefits of working with Statamic, especially when using the default setup with flat files and no database, is that deploying the site can truly be a breeze.
Follow along as I walk through deploying Statamic project with Forge and Digital Ocean, if you’d rather just soak in the info. Watch it here:
Since the entire project, in this case, is saved in the Git repo and pushed up to Github, deploying from Forge isn’t too complicated once you have all of the setup in place.
The Setup
Skip the setup if you already have a Forge account connected to your server!
First, you’ll need to have an account on Digital Ocean. You will need to generate an API key for this account, which your Forge account will need. This API connection will require full permissions. In the Forge account settings, you can manage your providers (such as Digital Ocean, or AWS, etc.) so that Forge can provision your servers for you, which is why the full permissions are needed.
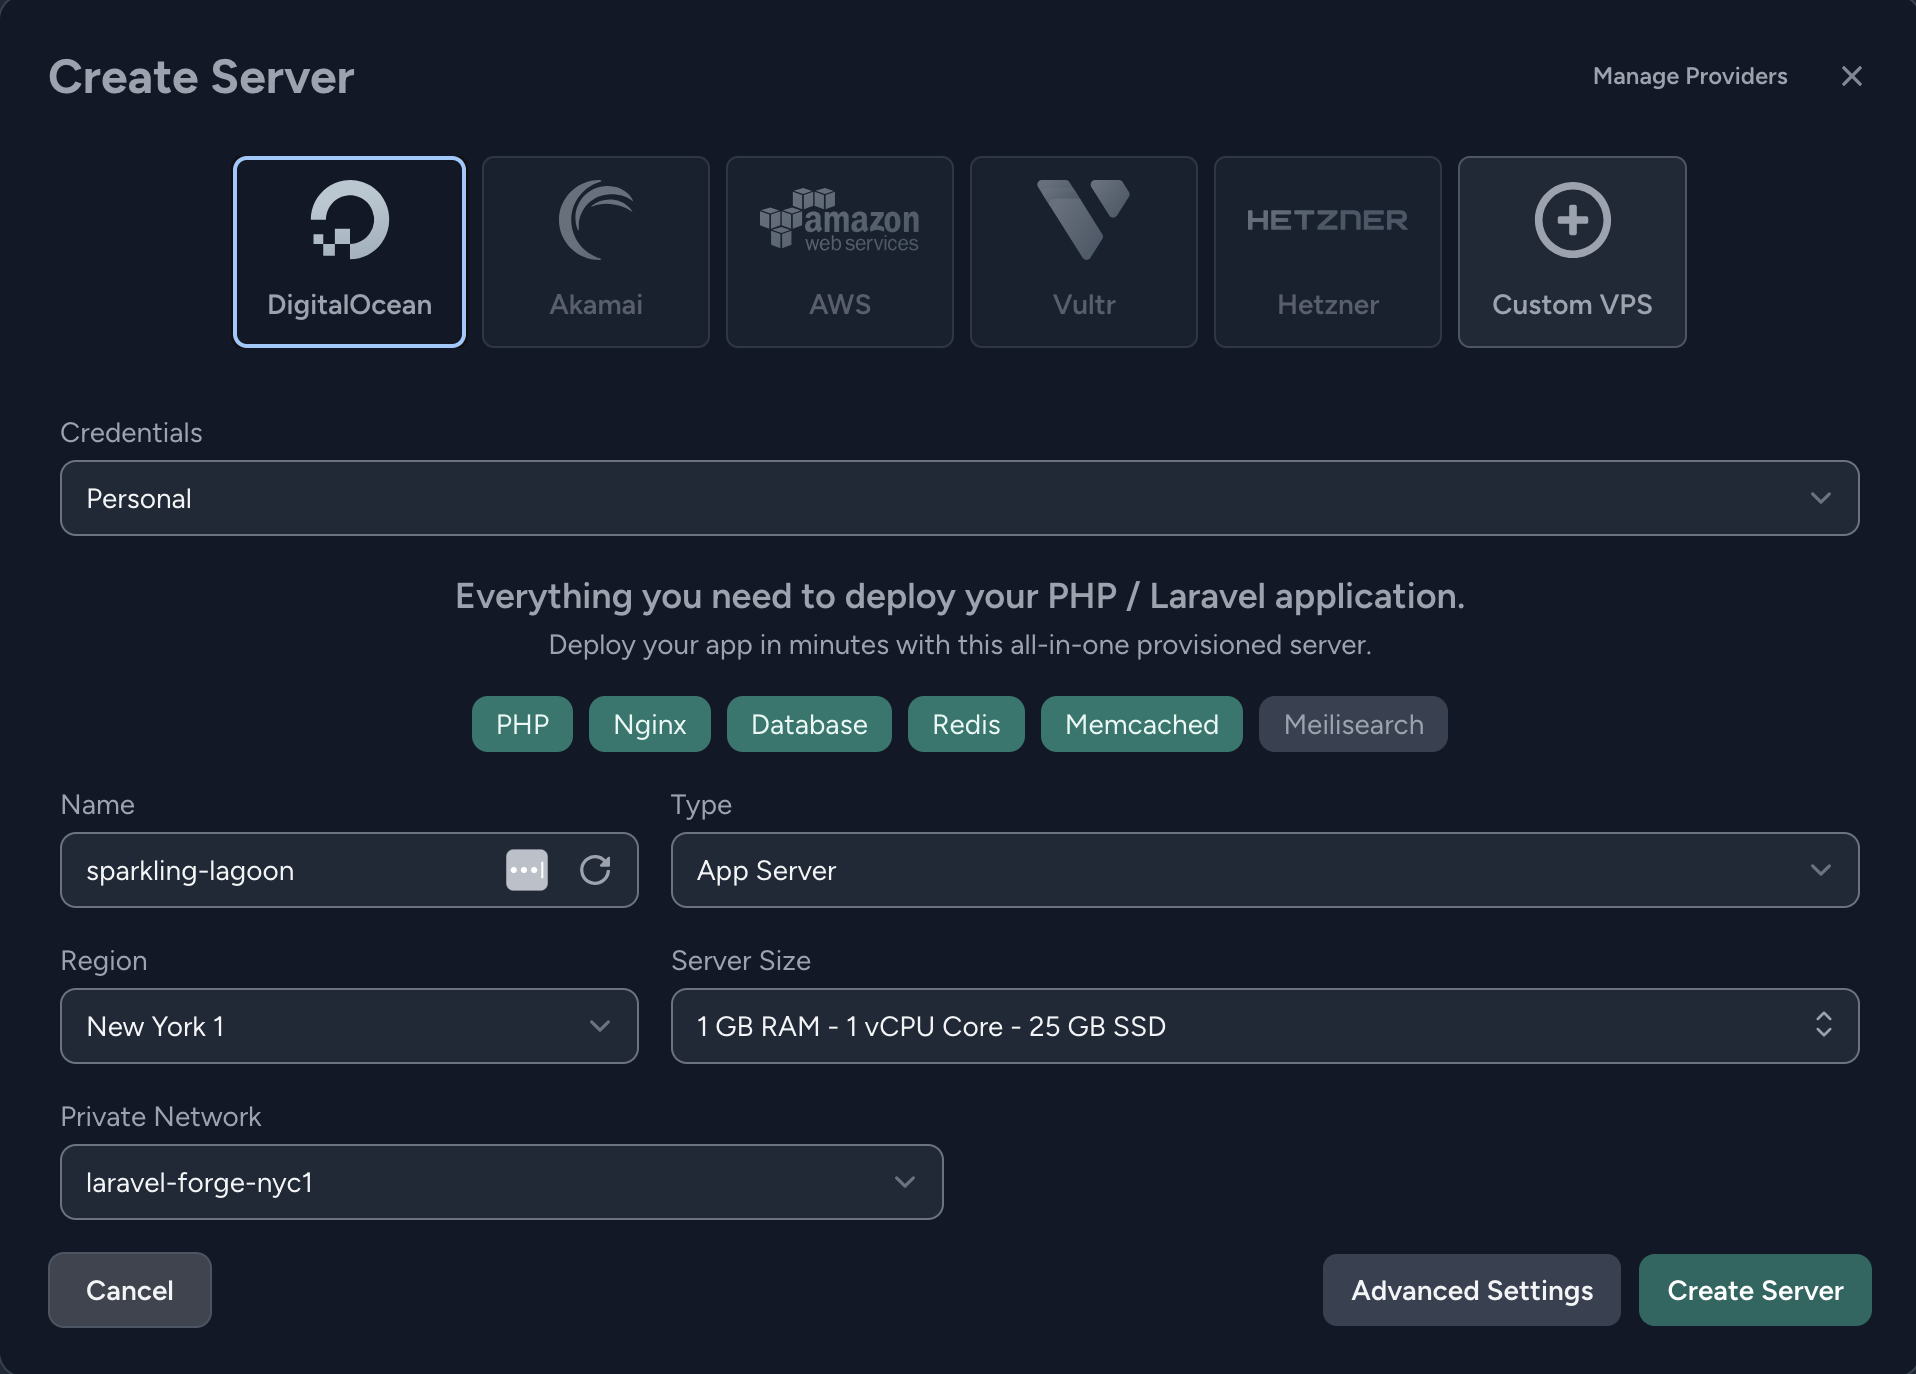
Next, you can hit that big “Create Server” button to provision your server. For a simple site, the bare basics are probably more than enough to get you started:
Create a Site
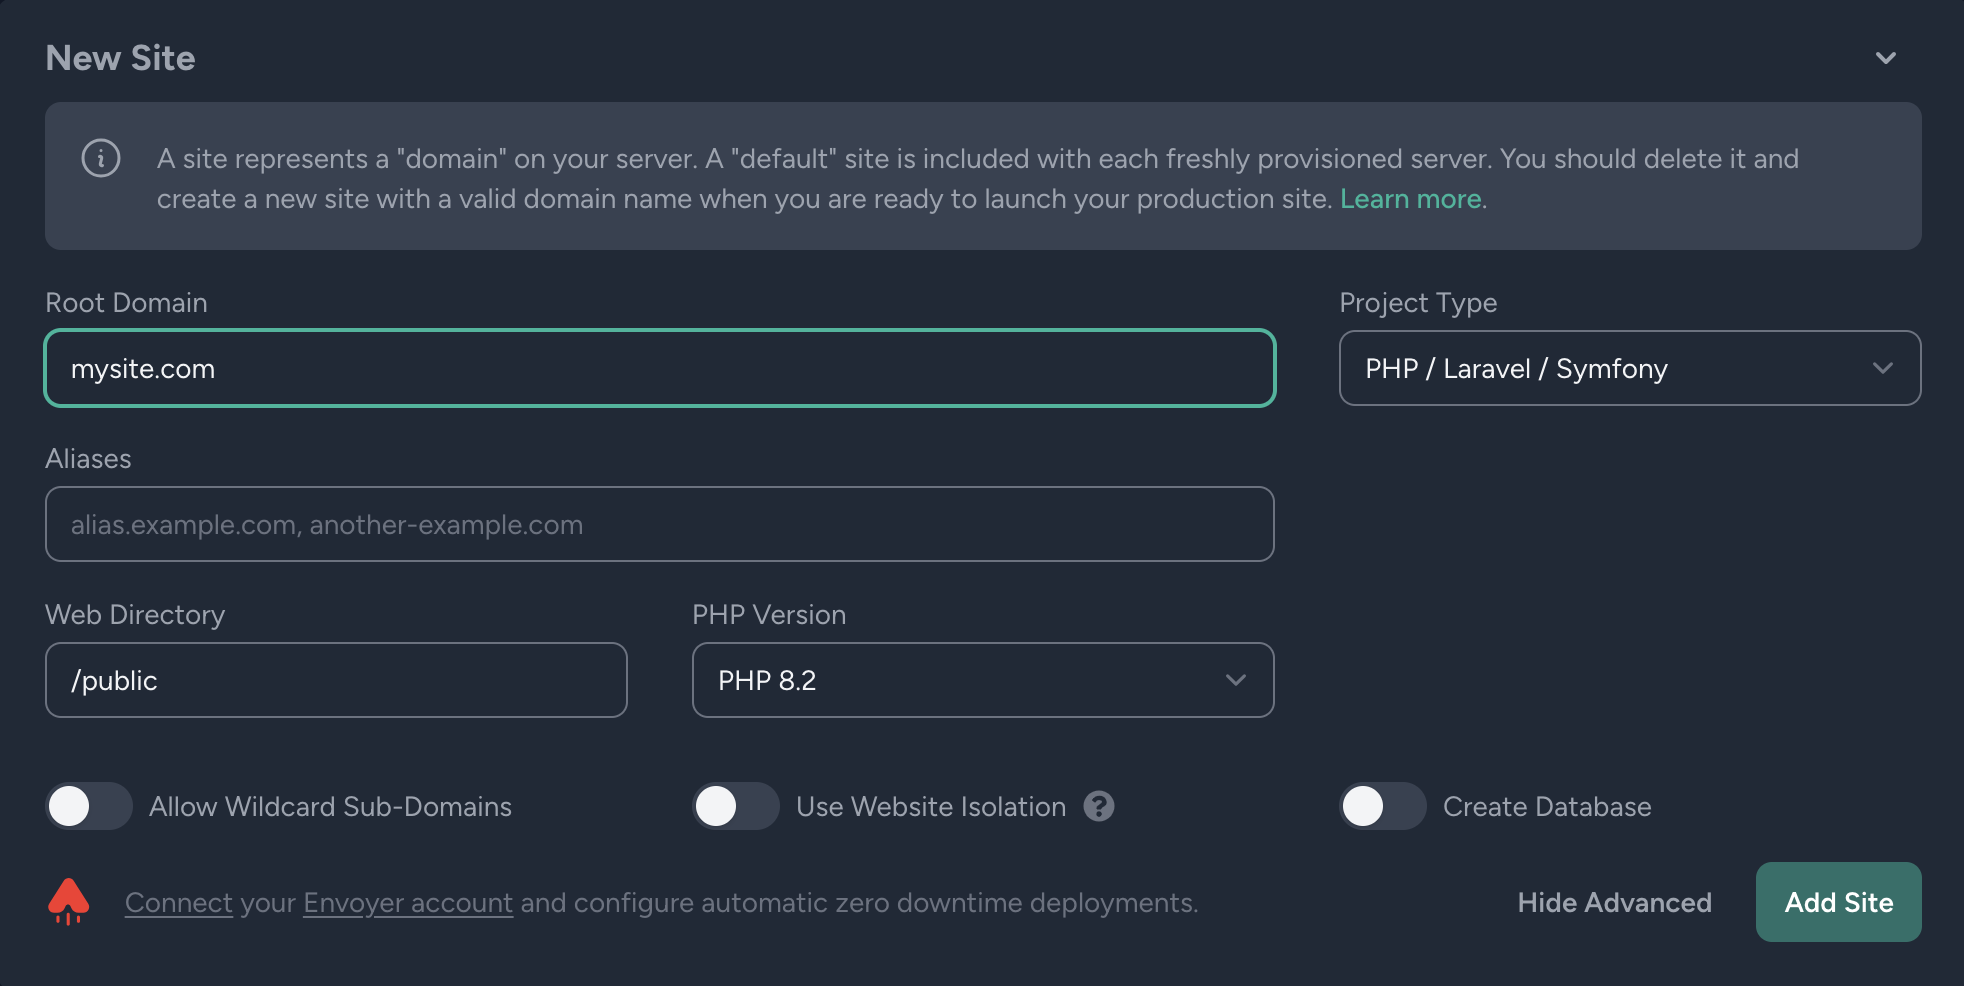
Once your server is provisioned, you can create a site to live there. Be sure to enter the URL, and select the rest of the options you need. For a basic flat-file Statamic, the defaults are great.
Everything is in Git
Once the site requirements are installed, can you select a bare install of Statamic, or you can connect a Git repo. If your account is already connected, type in the field and it should find your repo, and detect the default branch, whether it’s master or main or whatever.

Configure App Settings
Before we deploy, we’ll want to ensure that a few additional things are in place. First, let’s ensure that our DNS is configured to point to the IP address. Without this, the site won’t resolve, and the next step won’t work either.
A simple way to do this is to set the A Record value to the IP address shown in your Forge server dashboard.
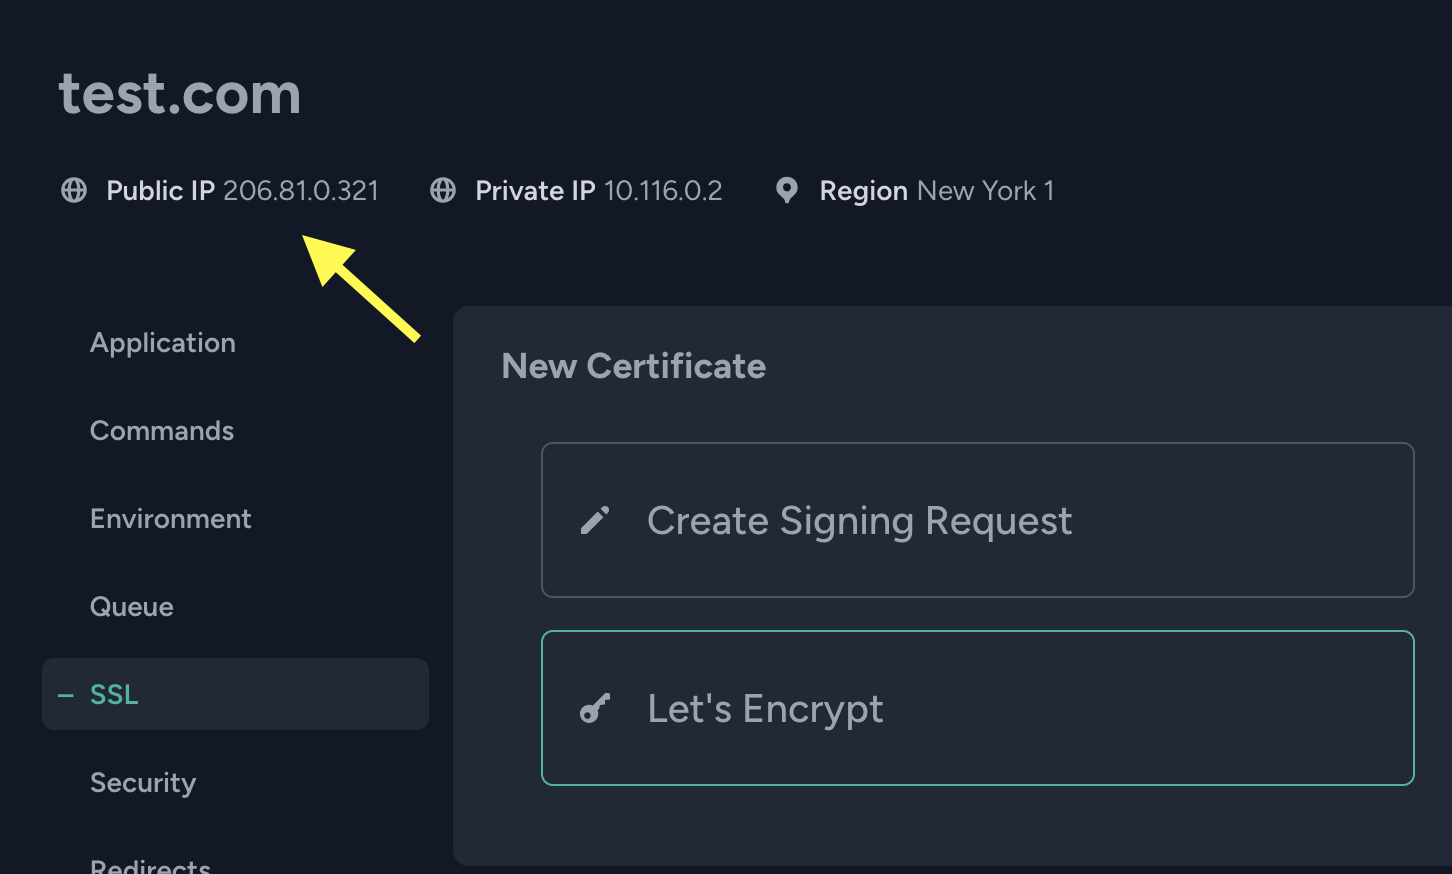
Next, let’s use Let’s Encrypt to secure connections to our site using SSL.
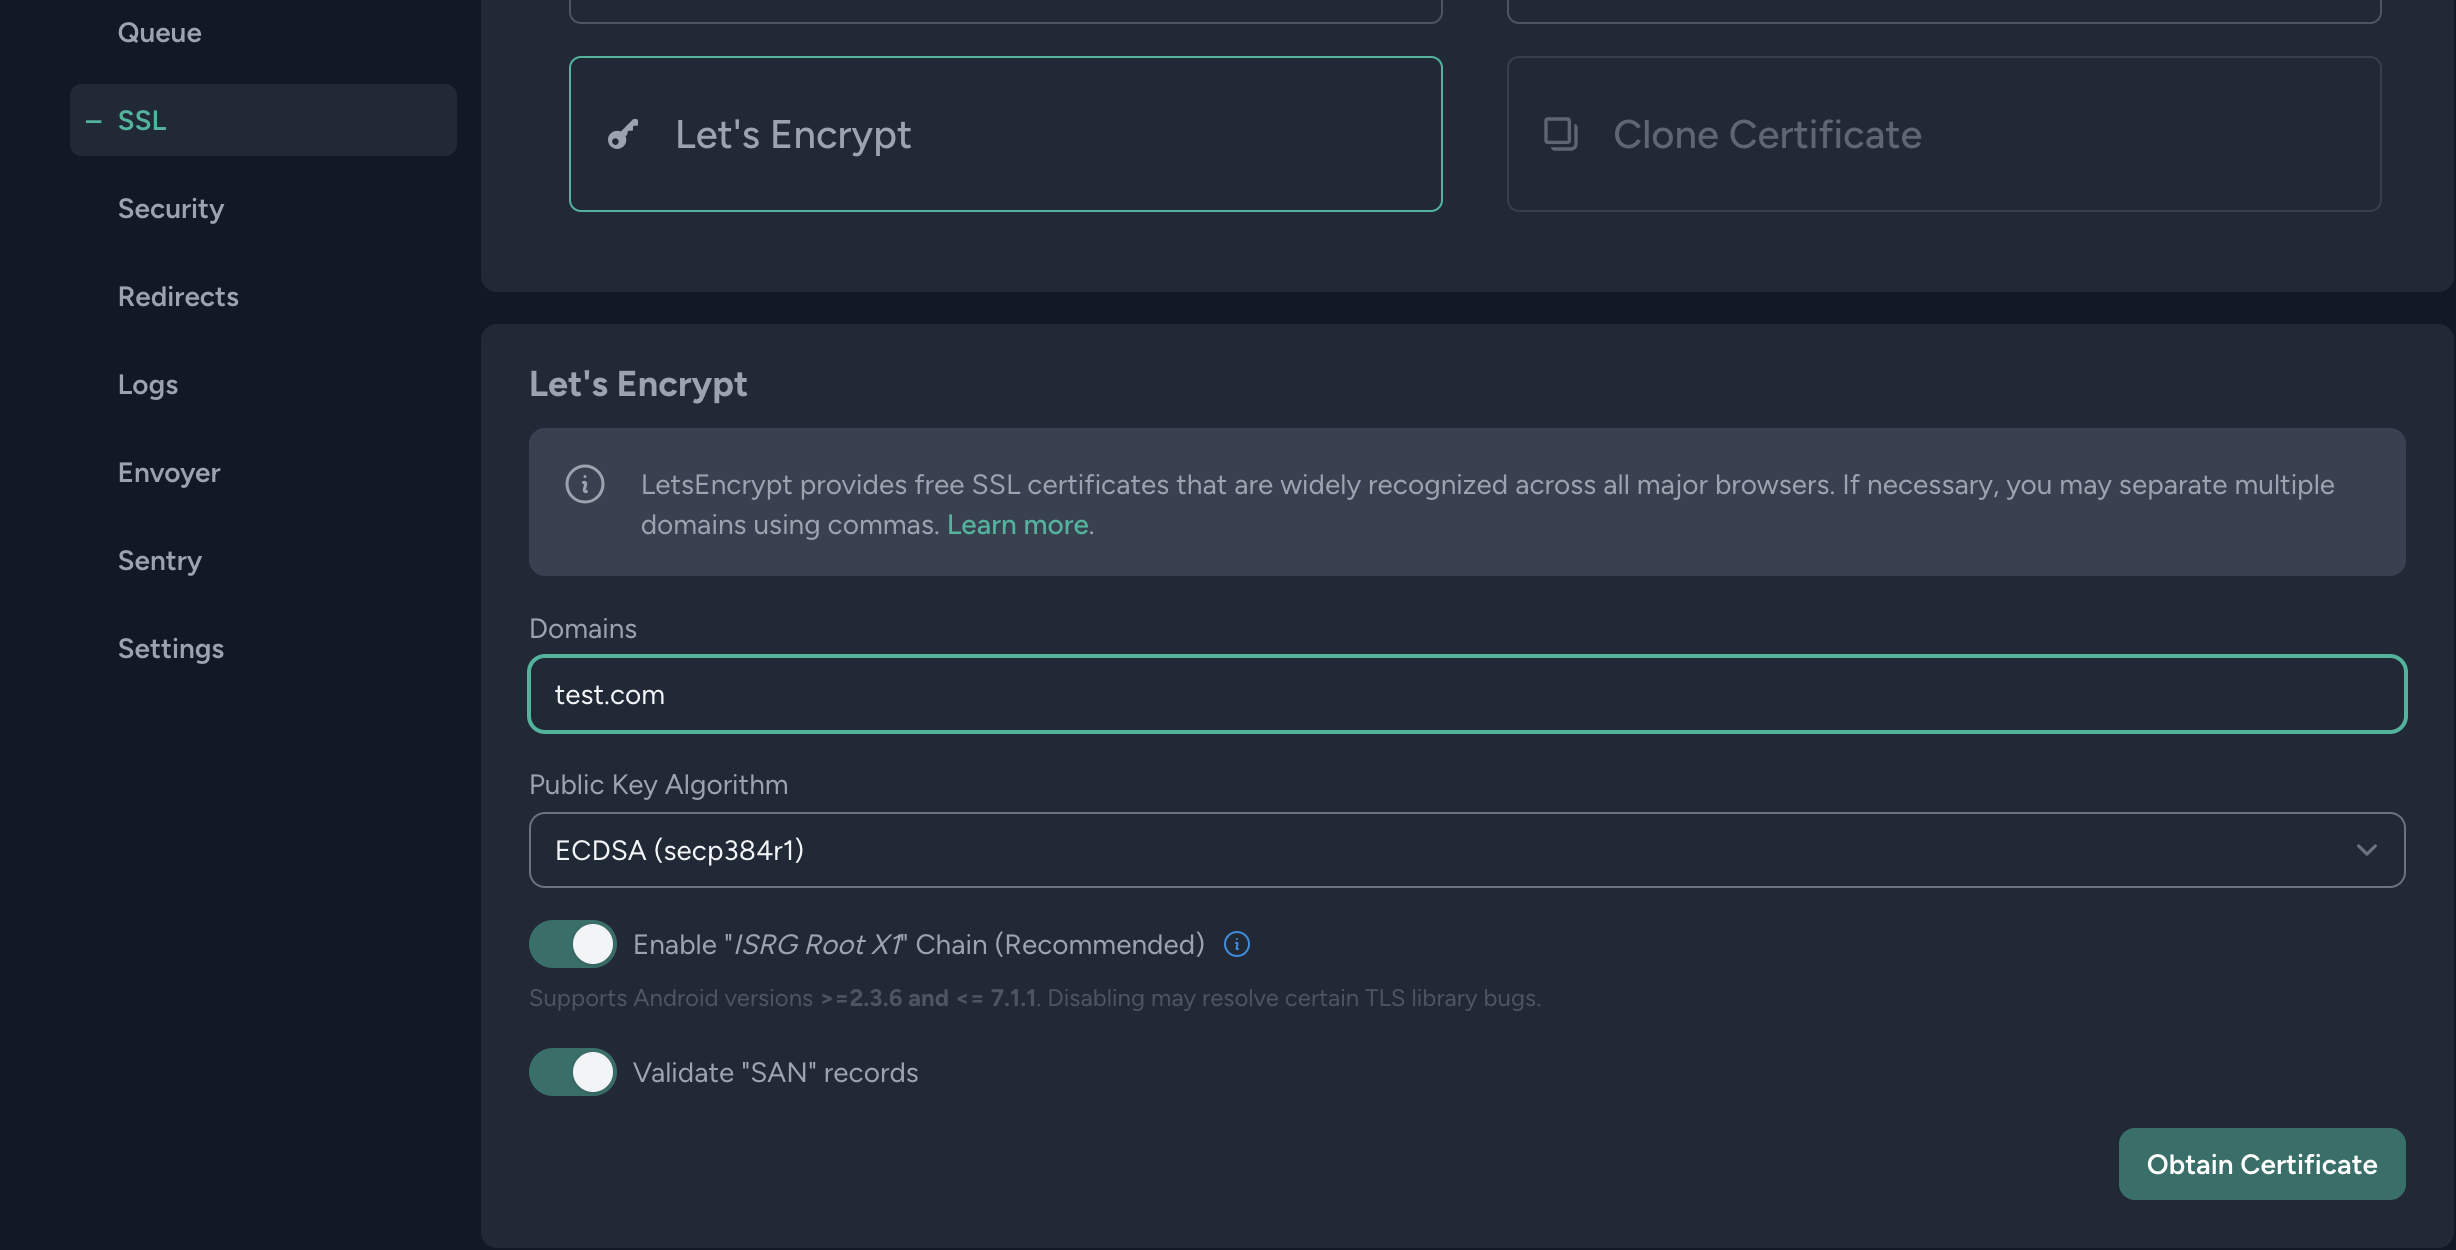
When entering the domains, you can select everything you want encrypted, just make sure that each item is already configured in your DNS. So, if you want test.com and www.test.com to use SSL, they both need to have entries in your DNS.
Then, go to the .env tab, and make sure the values match the local .env settings where they make sense, except for where live settings need to be change. When you install the site in the first place, the APP_URL will already be configured to the domain that you enter when creating the site in the first place. Other values to make sure you need include API keys for services you might be using (Google Maps, Postmark, etc.) that are required for your app to function.
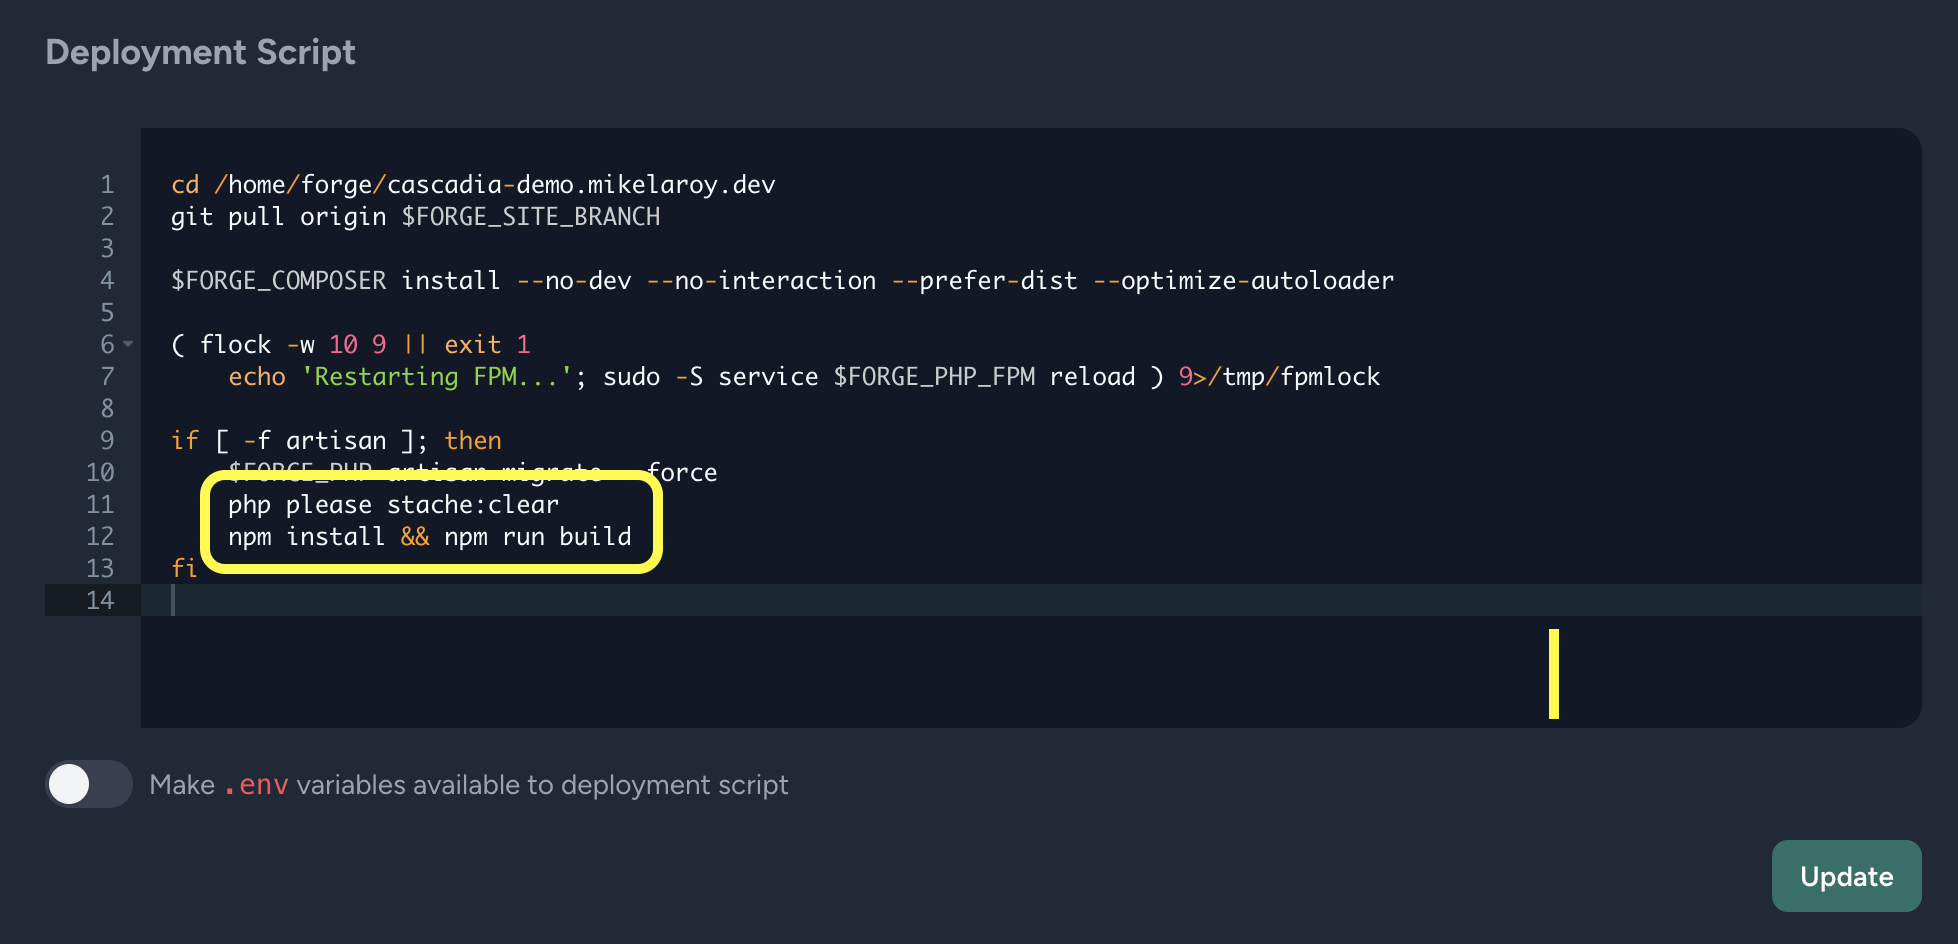
Finally, the deployments tab will reveal the Deployment Script screen. For a Statamic app, you will likely need the php please cache:clear and npm run build commands to clear the Stache, and rebuild your assets.
Deploy Your Site!
Let’s review - we need to have a few things in place before we hit that “Deploy Now"" button:
- Create a server on your DO account from the Forge Dashboard
- Create a site on your server
- Ensure your DNS points to the server’s IP address
- Set up SSL to secure your site with
https - Configure your Environment
.envsettings for the live site - Create your deploy scripts for Statamic
Once all of these are in place, you should be able to “Deploy Now” - this should run your deployment scripts, and send a fresh build of your app to the server. If you have Github and Forge already connected beforehand, this should take less than five minutes!.

Join my Email List
Get notified about my work with Statamic - from new YouTube videos to articles and tutorials on my blog, and more.